Maya:mia_material_part05
Let’s start where we left off last time ●Bump The bump input accepts a shader that perturbs the normal for bump ma […]
Houdini勉強回。Houdiniについてくるサンプルファイルが、とても勉強になったので復習がてら解説してみようとてするなり。使用するサンプルファイルは、VellumSmokeSheetです。サンプルファイルの開き方はこちらの記事参考。https://www.sidefx.com/docs/houdini/examples/nodes/dop/vellumsolver/VellumSmokeSheet.htmlこんな感じに、布の下に入り込んだ空気が押し出されてブワッとなる、みたいなシミュレーションです。上図赤枠部分が、SIM前の仕込み。上図緑枠部分が、[...]
read more
VEX sentence of Wrangle.Global Varialbles that frequently used//SOP@Cd //Point Color@P //Point Position@v //Point Velocity@ptnum //Processing Point Number@pscale //Particle Scale@numpt //Total Point Number@N //Normal//Time@Frame; //Frame@T[...]
read more
「ひたすら実践!Houdiniエフェクト」Amazonでの発売が9月30日、書店刊行が10月4日となります。本書はHoudiniのエフェクト作成について学習する本です。Amazonとボーンデジタルサイト、他で購入できます。紙と電子版の両方あります。Kindle版はこちらPDF版はボーンデジタルサイトから購入可能です。エフェクトの種類ごとにChapterが分かれており、基本学習と応用作例を用意してあります。作例は順を追って進めていくことで同じものが作れるようになっていますので、初心者の方でも安心して進められると思います。また本書は最新のHoudini20.[...]
read more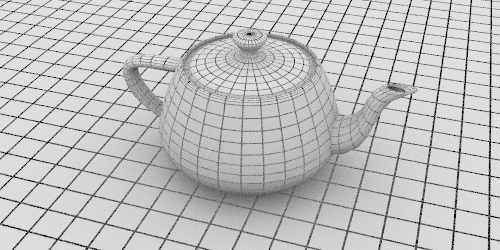
今回は、ワイヤーフレームでレンダリングする方法です。こういうのを出力したいのです。主にメイキング作成時によく使います。それ以外での使い道が果たしてあるのか!?ワイヤーフレームを出力するには、wireframeノードを使います(名前そのままですね)ここでは標準のCrayマテリアルにWireframeノードの要素を追加するかたちで使用しています。以下、マテリアルのネットワークです。こんな感じです。wireframeノード単体でもラインの色調整は出きるのですが、そのままだと黒地白ラインなので、rampノード使って反転し白地黒ラインにしてます。(もしくはco[...]
read more
夜な夜なこんなのを作ってました。作業画面はこんな感じです。元ネタはこちら。サクッと作れて面白かったです。以下余談。最近、レンダリングにはKarmaのXPUレンダリングを使っているのですが、非常に早くていいですね。このくらいなら、Full HDサイズでも1枚30秒くらいで終わるので、おうちマシン使っても計240フレームが2時間くらいで吐き出されます。Mantraなら1枚3~5分くらい、Redshiftでも1枚1~2分くらいかかっていたイメージなので、ずいぶん早くなったなと。この手のテクノロジー進化は、時間節約になるので非常に有難いですね。[...]
read more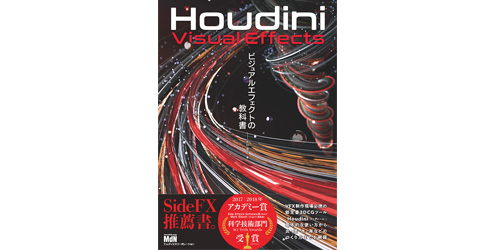
Houdiniの本が販売中です。以下、本の概要です。「Houdini ビジュアルエフェクトの教科書」発売日:2018年5月15日(火)価格 :4212円(税込)出版社: エムディエヌコーポレーション480P フルカラー ダウンロードデータあり!本の詳細はMdNのページ、もしくはAmazonにてご確認いただけます。以下、著者よりコメント。この本は、"Houdiniのエフェクト学習本"です。3DCGで煙や炎、水などの作り方を学ぶ、入門書です。私がHoudini覚え始めた時に、「こういう本が欲しいんだよぉぉぉ[...]
read more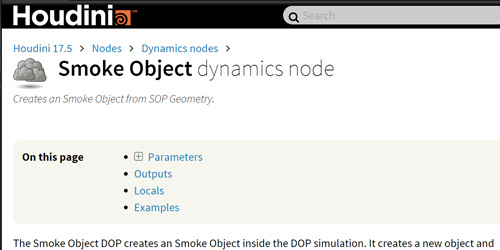
Houdiniについてくるサンプルファイルの開き方。その11)メインメニューからHelp > Example Fileを選択。1)カテゴリごとにわかれているので、見たいサンプルをポチポチ選ぶ。3)読み込む。Loadは、起動中のHoudiniにサンプルを読み込む。Launchは、新しくHoudiniを起動してサンプルを読み込む。その21)NetWork Viewでノードを選択。2)パラメータエディタ右上の?ボタンを押して、そのノードのHelpをウィンドウを起動。3)ウィンドウの下の方にそのノードに関連したEXAMPLESが[...]
read more
今回はちょっと変わったネタを。極座標変換についてです。半分、数学です。極座標系とは、ザックリ言うと"角度(θ)"と"距離(r)"で表される座標の事です。下に二次元の直交座標系と極座標系の図を載せてみました。図のように、同じ座標でも直交座標と極座標という二つの方法で表すことが出来きます。同じ一つの場所を異なる座標系で表すことが出来るというのは、時として非常にありがたいことだったりします。直交座標ではややこしい制御も、極座標ならすんなりなんてこともあるかもしれませんからwこの、直交座標系と極座標系を行き来するためには、変換式が必要になります。難しい話は、[...]
read more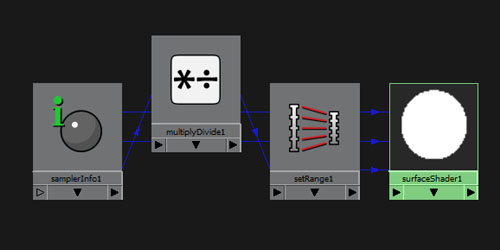
今回は「Z用マテリアルがどうしても必要。でも作るの面倒だ。」そんなときに役立つ方法です。古いバージョンのMayaでは、レンダレイヤーから右クリックでオクルージョンとかZデプスとか、プリセットで選べたのだが、いつ頃からかそれがなくなってしまいました。オクルージョンはともかくZ用のマテリアルは楽に作れただけに残念だなぁ、なんて思ってたらありました。レンダーレイヤーのアトリビュートのプリセットに残ってました。ここのLuminance Depthを選ぶと↓のマテリアルが作られます。(レイヤー内のオブジェクトに自動で割り当てられてしまうので注意)作られたマテリアルに手を加える[...]
read more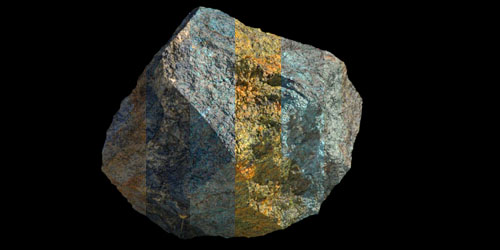
Houdiniじゃ!石のAssetじゃ!これが、こうなって、こうじゃ!テクスチャとパターン変えてこうじゃ!チャームポイントはポリゴン数が激増するところじゃ♪めちゃ重じゃ!形の作成はVOPじゃ!中身はこうじゃ!worleynoiseとturbnoiseとveinsの三重奏じゃ!質感は、標準のStoneマテリアルベースじゃ!Hoduini15では、新しい石のマテリアルも幾つか追加されてるそうじゃ!楽しみじゃ!また次回じゃ!追記こちらの石の作り方、拙著「Houdiniビジュアルエフェクトの教科書」に掲[...]
read more
Let’s start where we left off last time ●Bump The bump input accepts a shader that perturbs the normal for bump ma […]

Let’s start where we left off last time ●Indirect Illumination Options ・FG/GI Multiplier An indirect multiplier th […]
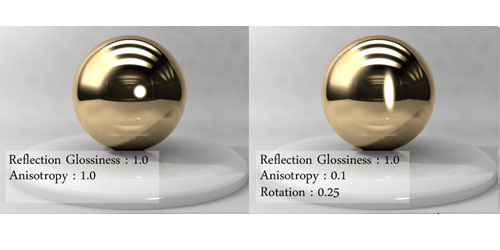
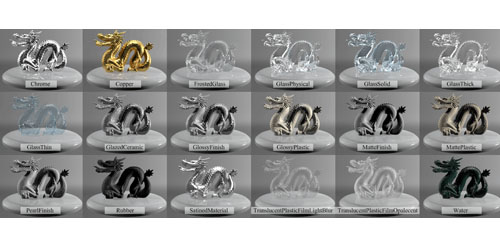
Let’s start where we left off last time ●Anisotropy ・Anisotropy Sets the ratio between the width and height of the […]
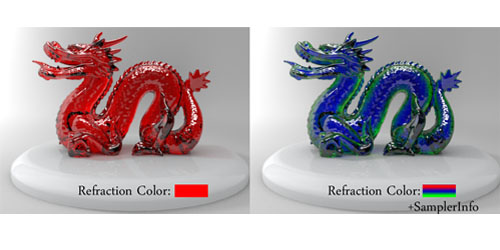
Let’s start where we left off last time ●Refraction ・Index of Refraction The amount that a ray of light bends when […]
I checked and summarized “mia_material” Although there was a blank part of the knowledge which has not yet b […]
